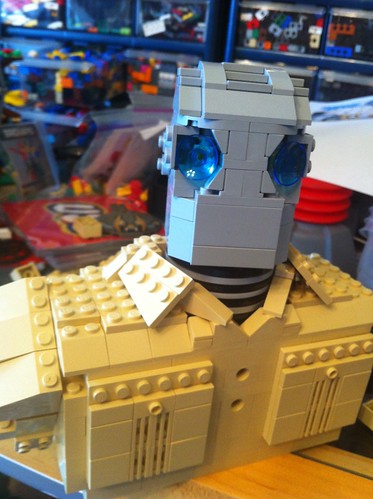
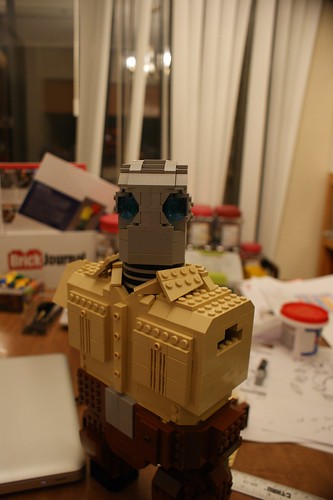
It took a couple of days of hammering at the head shape to get something - using SNOT mostly. After that, it was the neck and shoulders that were done. I followed the graphic above for the look:

The collar was the thing I really wanted to work. After that, the pockets came into play, but those were pretty easy compared to the collar. The head originally had a round brick to slide a flextube that held the neck in place, but I later made it so the head simply slid into the neck. Because of its looseness, the head can turn and pivot up and down slightly.
And the next week the model just sat for a week. Then it was mentioned to the organizers that this would be at the event, so Atomic Robo HAD to be finished...so...

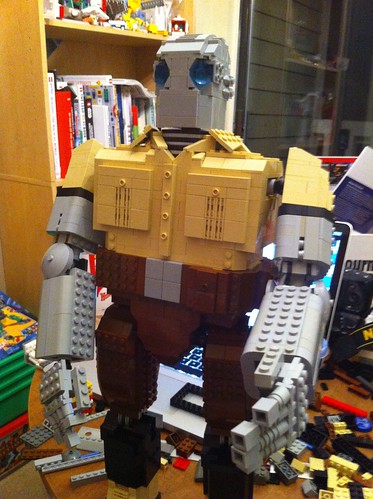
His waist was worked on, and his legs started coming into shape.
Here's where things get really tough. The hinges that LEGO has available are not meant for things like these. I had to figure out what hinges to use and how to optimize their strength. The newer large click swivels were used for the waist, elbow and shoulder joints. For the knees I used two technic click joints, and ended up with this:

The wrist is another click swivel, but the fingers are simple clip parts. The finger tips are bricks so I can use plates to make bent fingers if needed.
I liked him, but he looked incomplete. He needed a gun. However, having him hold a gun proved to be a real challenge - his balance standing straight is easy to manage. All the hinges are meant to stay straight - in this case straight vertical.
Take a look at this pic and I will tell you the various tricks I used to make this work:

1. The pose - I really didn't like the straight standing. So I had Atomic Robo stand on a raised hill. This affected the balance tremendously. The model was bent forward to make the balance work. And unseen here is that the boots only attach on a 2x4 brick. The shins protect the joints, which slide in. Yes, you can slide the him off the boots. I did that for portability.
2. The gun and arm - I originally made a big gun - a REAL big gun. But two issues came up - the weight threw the balance off. Way off. I had to cut the gun in half. I also had to secure the gun to the hand, so I rebuilt the hand and gun so the hand fit in it and the gun is attached to the inside of the elbow. The right arm is a gun/arm, and there is a lot of weight on it. So how does it stay?
3. A pistol?? - If you look under the arm, there is a pistol in holster. It's not really, but the holster is there. It turns out that if the joints were moved to a certain position, the arm would rest on the holster and be stable. Bt a solid bump would knock the arm off, and the gun would swing down and literally tear the arm off with its momentum, which would lead to complete collapse. That was solved by...
4. The OTHER arm - I wanted the other arm to hold the barrel anyways, so I built a quick attachment point in the hand to the barrel, and after some fumbling, I got them to meet and join. Both arms kept the gun in place and made for a very stable position.
5. Details - I am really proud of the grenades. Really. And the collar. And the head.
I tried to build this for travel, so the head is removable, the arms and legs are movable, and the body removes from the stand. Takes a little setup, but when done, he get a good impression:
even from Brian Clevinger, the writer of Atomic Robo!
Now to see if I can build another figure....and get the legs closer together...


1 comment:
Its really cool all around.
I was going to comment on the size of the pockets, but you are basing it on the character, whose pockets are really that size, so instead of a criticism of it, its actually a positive aspect of it... an excellent depiction of the cartoon character.
Post a Comment